Project Review Tasks Page
The Project Review Tasks page contains all the current tasks that have been created within the current project.
Tasks created from inside a project are slightly different than regular tasks created outside of a project:
- A project-based review task is created from the Content Fusion browser interface inside a project, while a regular review task is created either from Oxygen XML Editor/Author or the browser interface, outside a project.
- The changes made to a project-based review task are stored in the Git repository of the project and will be merged in the project default branch and pushed to the upstream remote repository when the task is finished.
- All the authors that have access to a project will be able to see all review tasks created in that project.
- A project-based review task contains all the files in the project (not just the files selected for review).
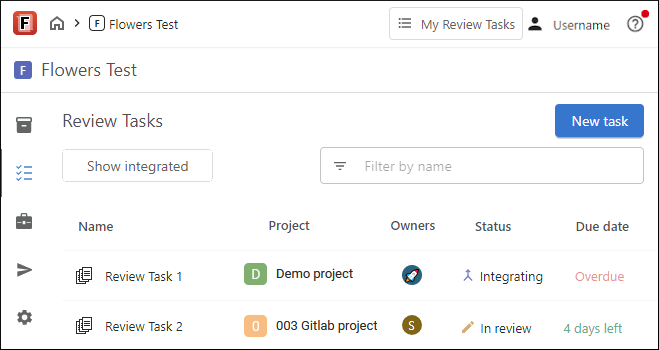
To open an existing task, simply click on it. This open the Task Files page.
You can use the Filter by name field to filter the list of review tasks, making it easier to find specific tasks.
To see tasks that you created (or are assigned as an owner), click the Owned By Me tab. To see tasks that have been assigned to you, click the Assigned To Me tab. The table also has columns that show project information (if applicable), the Owners of the review task, the Review Status, and the Due Date (if specified in the Task Settings page).
A task is displayed as In review unless it is closed by a task owner. If a task has been closed, the status is displayed as Review closed. Other task states that a Content Author could see is Integrating and Integrated (see the Closing a Review Task and Integrating Changes section below).
Integrated tasks are not displayed by default. To view all tasks, click the Show integrated button (when inside the Owned By Me tab). To hide them, click the same button again.
Also, if you want to see the tasks that have been finalized (for those that are assigned to you), click the Show finalized button (when inside the Assigned to Me tab).
For tasks in the Owned By Me tab, if you hover over the task, an ellipsis (3 vertical dots) becomes available on the far right side. This opens an actions menu that includes a Delete action that can be used to delete the review task.
Creating New Tasks and Files Within a Project
- From the Review Tasks page, click the New Task button.
- Enter a title for the task in the field at the top of the pane. Click the check mark on the right side when you are done.
- Optionally, you can specify a Due Date. The amount of time left before the due date arrives is displayed under the review task's title when you have navigated inside the task and also in the table in the My Review Tasks page. Also, any reviewers who have not finalized the task will receive an email notification when the due date is within 3 days, 1 day, and 12 hours of its expiration.
- To add files to the task, select the file from the
Files side-pane.Tip: If you want to create a new file to add to the task (or upload an existing one from your computer), you will first need to finish creating the task. After clicking the Create button, the Task Files page for the review task should be open. On this page, you can create or upload files to the task. To create a new file, click the New File button and you will be able to choose a file type from a list of templates, then choose a file name in the text field at the bottom, and click OK. You can then open the file in the visual editor page to make changes to the document. To upload a file, click the
 Upload button and
select the file from your computer.
Upload button and
select the file from your computer. - Optionally, you can select a Context Publication (the publication must already be defined in the Project Publications Page). The benefit of specifying a context publication is that the files added to the task will be rendered as a hierarchical tree based upon the context DITA map defined in the publication.
- Optionally, select Settings from the left stripe to open the Task Settings page to configure options or delete the task.
- Click Create to finish the task creation process.
- The next logical step would most likely be to share the task with anyone you want to review the documents.
Closing a Review Task and Integrating Changes
A task owner can close the review process to reserve some time to address the feedback and integrate the changes. To close a task, click the Close review button in the top stripe (with a task opened). This locks the task and prevents others from making changes to the task. If further review is needed, you can click the Reopen review button to make the task editable again.
Once a project-based review task is closed, you then have access to a Start integrating button in the top stripe. This opens a built-in file comparison and merge tool where you can visually see the differences, choose which differences to copy to your local version, and merge the differences. The task status is changed to Integrating during this process.
Once in the Integrating state, only the author who initiated the integration can work on integrating the task. They can use the Cancel integration button to abandon the integration and allow another author to start the integration. Once they have finished integrating, they can use the Finish integration button to finalize the merge. This will change the task status to Integrated.