How to Configure a Microsoft SQL Server Connection
Note: The support to configure a Microsoft SQL Server connection is available in the
Enterprise edition only.
To configure a connection to a Microsoft SQL Server, follow these steps:
- Open the Preferences dialog box and go to Data Sources.
-
Click the
 New button in the Connections panel.
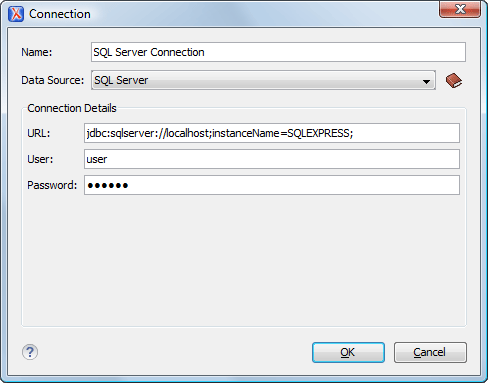
The dialog box for configuring a database connection is displayed.
Figure 1. Connection Configuration Dialog Box 
- Enter a unique name for the connection.
- Select the SQL Server data source in the Data Source drop-down menu.
-
Enter the connection details.
- Click the OK button to finish the connection configuration.
- To view your connection, go to the Data Source Explorer view (if the view is not displayed, it can be opened by selecting it from the menu) or switch to the Database perspective.
