Adding Tables in TEI Documents
You can use the  Insert Table action
on the toolbar or from the contextual menu to add a table in a TEI document. This action opens
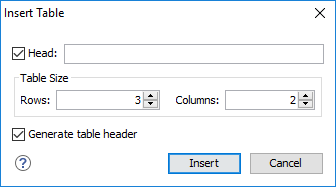
the Insert Table dialog box.

The dialog box allows you to configure the following options:
- Head
- If this checkbox is selected, you can specify a title for your table in the adjacent text box.
- Table Size
- Allows you to choose the number of Rows and Columns for the table.
- Generate table header
- If selected, an extra row will be inserted at the top of the table to be used as the table header.
Note:
The options in the Insert Table dialog box for TEI documents
are persistent, so changes made in one session will carry over to another.
When you click Insert, a simple table is inserted into your TEI document at the current cursor position.
Editing an Existing Table
You can edit the structure of an existing table using the table buttons on the toolbar (or in the contextual menu) to add or remove cells, rows, or columns. Additional attributes can be used to fine-tune the formatting of your tables by using the Attributes view (). Also, remember that underneath the visual representation, the table is really just XML. If necessary, you can edit the XML directly by switching to Text mode.
