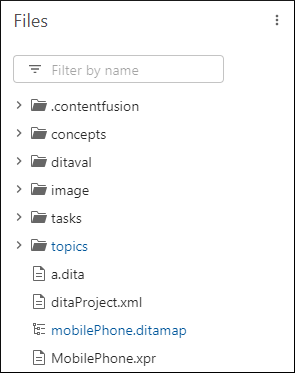
Workspace Files View
The Files view within the workspace displays the file/folder tree of a project.

Managing Folders
You can expand or collapse folders similar to any common file browser. To add a folder to the workspace, click the 3 vertical dots next to the parent folder and select New Folder. You can create a folder on the root level by selecting New Folder from the 3 vertical dots menu in the Files header at the top. To delete a folder from the workspace, click the 3 vertical dots next to the particular folder and select Delete folder.
Managing Files
You can use the Filter by name text field to search for a file by name.
Double-click on a file to open it in the visual editor. Each file that has been opened has a
tab at the top of the editing pane. You can click the  Close button on the right side of the tab to close
it. You can also right-click the tab to access additional actions (Close other
tabs, Close tabs to the left, Close tabs to
the right).
Move or Upload Resources Using Drag and Drop
You can use drag and drop functionality to move a file or folder (or a selection of multiple files or folders) to another location. You can also drag files or folders from your local computer and drop them in the Files tree to upload the resources at the particular drop location.
Move Resources Using Cut/Copy/Paste
You can also move files by using Cut, Copy, and Paste actions that are found in the contextual menu. You can right-click a resource (or a selection of multiple resources) while hovering to access contextual menu actions. Also, when hovering over a folder or file, a 3 vertical dots menu appears to the right. It also contains the contextual actions for that particular folder or file. If the copied resource is pasted in its same original location, the file is automatically renamed by adding a suffix to avoid duplicates.
Contextual Menu Actions
- New File
- Creates a new file within the selected folder. This opens a dialog box where you can select from a set of templates and enter a title for the new file. To create a file in the root directory, select New File from the 3 vertical dots menu in the Files header at the top.
- New Folder
- Creates a new folder within the selected folder.
- Upload File
- Allows you to upload a local file to the workspace.
- Cut
- Cuts the selected file to the clipboard.
- Copy
- Copies the selected file to the clipboard.
- Paste
- Pastes the file copied to the clipboard within the selected folder.
- Delete
- Deletes the selected file/folder from the workspace.
- Rename
- Allows you to rename the selected file/folder. You can also trigger the rename mechanism by selecting the item and using the Enter key.
