Managing Review Tasks in the Browser Interface
 Oxygen Content Fusion logo on the left side of the
top ribbon, click the Review Tasks button in the left stripe (if you
are in the main Projects page), click on My Review
Tasks in the top stripe, or you can click the
  Home button in the top stripe or you can use
the breadcrumb (if a page within a review task is open).
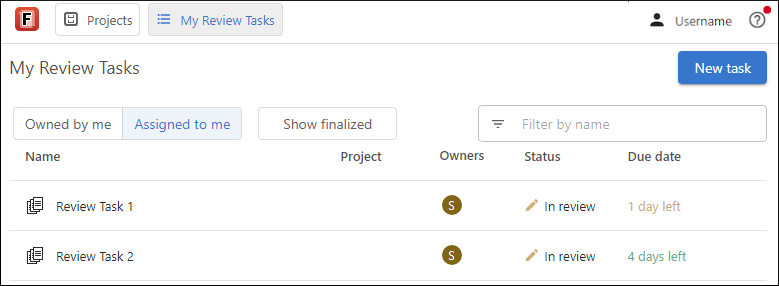
To see tasks that you created (or are assigned as an owner), click the Owned By Me tab. To see tasks that have been assigned to you, click the Assigned To Me tab. The table also has columns that show project information (if applicable), the Owners of the review task, the Review Status, and the Due Date (if specified in the Task Settings page).
Also, if you want to see the tasks that have been finalized (for those that are assigned to you), click the Show finalized button.
You can use the Filter by name field to filter the list of review tasks, making it easier to find specific tasks.
To open an existing task, simply click on it. This open the Task Files page.
The status of the task is displayed to the right of each task. A task is displayed as In review unless it is closed by a task owner. If a task has been closed, the status is displayed as Review closed.
- Delete - Deletes the review task.
- Mark as integrated (Available if the task is in the Review closed state) - Archives the task and removes it from visibility for all users.
Review Tasks Header
Whenever a review task is open, the header just below the upper stripe remains the same no matter what page you navigate to within the review task. It contains a variety of helpful information and some useful actions.

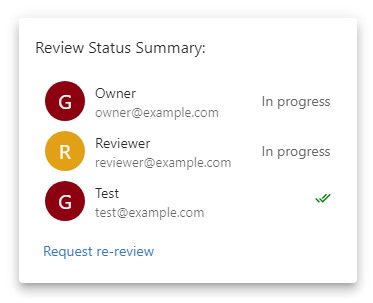
In the review task header stripe, you can see the title of the task, the status of the task, information about the task owners, details about the number of reviewers who have finalized the task, and information about when its due (if a due date is specified in the Task Settings page). You can click on the Owners area to see information about the task owners. You can click on the Finalized widget (drop-down) to see the status for each assigned reviewer:

If a task owner clicks on the Finalized widget (drop-down) for a task that has reviewers who have finalized their review, the task owner has access to a Request re-review button. Clicking this button resets the finalized status for all reviewers and their status is changed to In progress. Also, if the task owner re-opens a closed task, the finalized status is reset for all reviewers.
Any users who have been assigned to the task but have not yet accessed it are labeled as Pending in the Review Status Summary pop-up window so that task owners can identify users who have ignored the review request.
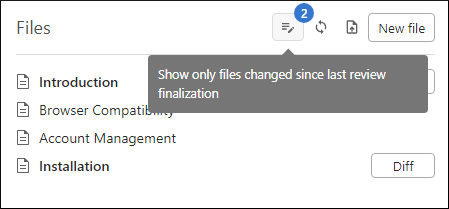
When a reviewer opens a task that the owner requested that they do another review, the Task Files page includes a Changed files only filter option to make it easy to identify which files have changes that need to be reviewed again.

Creating New Tasks and Files in the Browser Interface
It is possible to create a task directly in the Oxygen Content Fusion browser interface. This means that the task creation process is available to anyone who has access to the Oxygen Content Fusion browser interface, even if they do not have access to Oxygen XML Editor/Author.
You can also create or upload files to a newly created task or an existing task.
- From the My Review Tasks page, click the New Task button.
- Enter a title for the task in the field at the top of the pane. Click the check mark on the right side when you are done.
- You can create or upload files to the task. To create a new file,
click the New File button and you will be able to choose a file
type from a list of templates, then choose a file name in the text field at the bottom,
and click OK. To upload a file, click the
 Upload button and
select the file from your system's file browser.
 - Open the new file in the visual editor page (if not already
opened) and use the visual editor to make changes to the document.Tip:If you are a task owner, you have access to the
 Toggle
Change Tracking toolbar button. You may want to toggle this feature off
when adding content to a new file.
 - Optionally, select Settings from the left stripe to open the Task Settings page to configure options or delete the task.
- The next logical step would most likely be to share the task with anyone you want to review the documents.
